In cinematography, you don’t need a million-dollar budget to make something look good. In fact, you can probably find everything you need lying around your house. “But wait,” you might say, “how am I supposed to compete with all those big-shot filmmakers and their fancy equipment?” Well, the truth is, you don’t need to.
You’ve got a story to tell, and that’s what really matters. So, ditch the glossy veneer and let’s talk about how you can use some good old-fashioned elbow grease to create some cinematic magic. Sure, it might not be as pretty as the stuff you see in the movies, but who cares?
It’s your vision, your creation, and that’s what counts. So, let’s get down to business and figure out how you can turn your humble household items into the next big thing.
The Bare Essentials to Keep In Mind
At its core, cinematography is about visual storytelling. Whether you’re handling a camera or fussing with lights, your goal is to guide the viewer’s eye and evoke emotions. Remember, it’s not just what you show, but how you show it that counts. So, how do you make a compelling film with limited tools? Let’s talk technique.
Classic Shots and What They’re Good For
1. Extreme Long Shots
Want to establish the setting of your story without blowing the budget on sweeping aerial shots? No sweat. Just find a nice elevated vantage point and use that wide establishing shot to set the scene. It helps ground your audience in the location and can even give them a sense of the timeframe.
2. Bird’s Eye View
Taking an aerial perspective can really elevate your shots. Whether you scale up to a vantage point, lean out a window, or use some creative camera positioning, you can transform everyday scenes into abstract masterpieces.
This “bird’s eye view” technique allows you to give your audience a unique, almost divine perspective on the subject matter. It’s a great way to add some visual interest and drama to your compositions.
3. Medium Shots
The medium shot is a staple in dialogue scenes. This framing captures characters from the waist up, which works great for depicting group interactions or more intimate two-person conversations.
It’s a versatile and commonly used shot that allows the audience to focus on the characters’ faces and body language without getting too close or distant.
4. Close-Ups
When you want to really go into the emotional depth of a character, close-up shots are key. Framing a character’s face tightly allows you to highlight the subtle nuances of their expressions – those fleeting moments that can have a powerful impact on the audience. It’s an effective way to forge a more intimate connection between the viewer and the character on screen.
5. Dutch Angle
Tilt your camera. That’s it. Suddenly, everything feels off-kilter. Use this when you want to add a dash of visual tension or hint that something’s amiss.
6. Over-the-Shoulder Shots
The over-the-shoulder shot can be a great choice for scenes with dialogue. It adds a bit of depth and a subtle voyeuristic element, almost like the viewer is peeking over the character’s shoulder during the conversation. This technique can be effective for drawing the audience in and making them feel like they’re right there in the scene.
Lighting and Lenses Are the Mood Setters
Forget expensive lighting rigs. A white shower curtain in front of your largest window works wonders for soft, flattering light. And for mood? Small LED flashlights can be your best options. Shine them through a CD to create lens flares, or position them to cast ominous shadows.
Camera lenses don’t need to be pricey, either. Experiment with different focal lengths to see how they change the story’s mood. Sometimes, what you exclude from the frame says just as much as what you include.
DIY Gear Hacks
Who said you need the latest gear to get that smooth, cinematic look?
- Dolly Shots: No dolly? No problem. A handcart, skateboard, or even a wheeled office chair can give you that smooth sailing feel. Just make sure your camera is stable.
- Homemade Slider: Grab a sturdy plank and some rollerblade wheels. Congrats, you’ve just saved yourself a few hundred bucks.
- Diffused Lighting: Seriously, a sheer white curtain or even a tattered bedsheet can soften that harsh afternoon light into something magical.
Sound and Fury
Imagine this situation: your visuals are straight-up Hollywood glam, but the audio sounds like it was recorded inside a dumpster. No worries – just whip out that trusty smartphone of yours and use it as a backup recorder. Just make sure it’s close enough to actually pick up the dialogue. It’s a simple solution, but it’ll definitely do the trick.
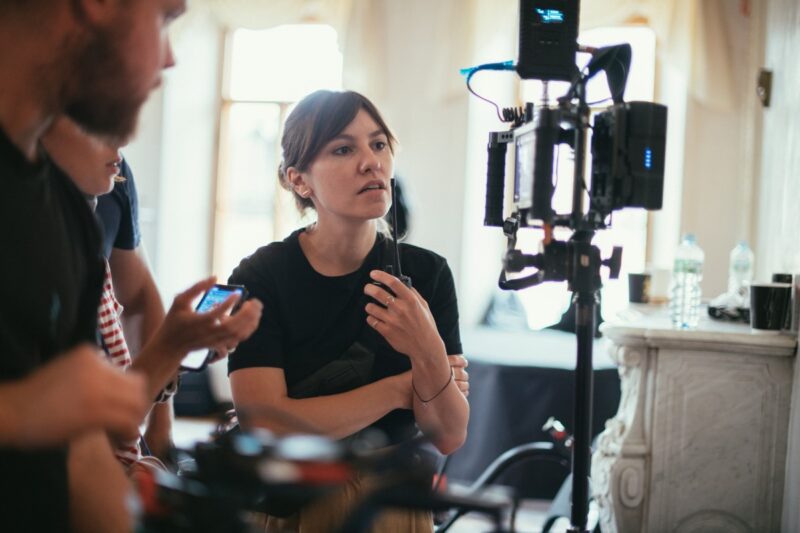
Cast, Crew, and Post-Production
Don’t cheap out on your team – that’s a rookie move. Even the fanciest filmmaking tricks are worthless if you don’t have the right people to pull them off. Make sure you’ve got some seasoned pros on board who know what they’re doing.
And then, once you’re done shooting, give your editor free rein to work their magic. Picking the right takes and smoothing out all those rough edges can be the difference between an amateur production and something that really shines.
Avoiding Common Pitfalls
Let’s be honest, it’s tempting to go overboard with special effects or to rely too heavily on post-production magic to fix what you didn’t get right on set. Focus on getting it right from the start. Use practical effects and keep your story grounded in reality, unless, of course, you’re shooting the next big sci-fi saga.
Wrapping Up
DIY cinematography isn’t just about finding the cheapest route – it’s about using smart, creative solutions to effectively tell your story. It’s not just about being a filmmaker, it’s about being a skilled craftsman, a true creator, and sometimes even a bit of a MacGyver.
Share your experiences and any unique techniques you’ve developed. Remember, every mistake is an opportunity to learn and improve for your next great scene. At the end of the day, let’s keep pushing the boundaries of what’s possible, no matter the size of the budget.