When you want to enjoy your favorite games or graphic applications, the last thing you need is a compatibility issue between your Nvidia graphics driver and Windows.
The error message “Nvidia Graphics Driver is Not Compatible with This Version of Windows” stops you from using your computer’s graphics potential.
This guide will help you solve this frequent and confusing issue, so you can connect your Nvidia graphics hardware with your Windows operating system smoothly.
1. Check and Download Drivers
Before attempting to fix any compatibility issues with Nvidia graphics drivers, it’s crucial to identify the architecture of your Windows operating system.
Computers generally run either a 32-bit or a 64-bit version of Windows. Installing a driver that doesn’t match your system’s architecture will lead to compatibility problems.
- Access System Information: To find out whether your system is 32-bit or 64-bit, you can access the System Information. This can be done by right-clicking on ‘This PC’ or ‘My Computer’ on your desktop or in File Explorer, and selecting ‘Properties’.
- Read the System Type: Under the ‘System’ section in the Properties window, look for ‘System type’. It will indicate whether your operating system is 32-bit or 64-bit.
Why It Matters?
The distinction between 32-bit and 64-bit Windows is crucial because a 32-bit driver won’t function properly on a 64-bit system and vice versa. Each architecture processes data differently, and drivers are designed to match this processing method.
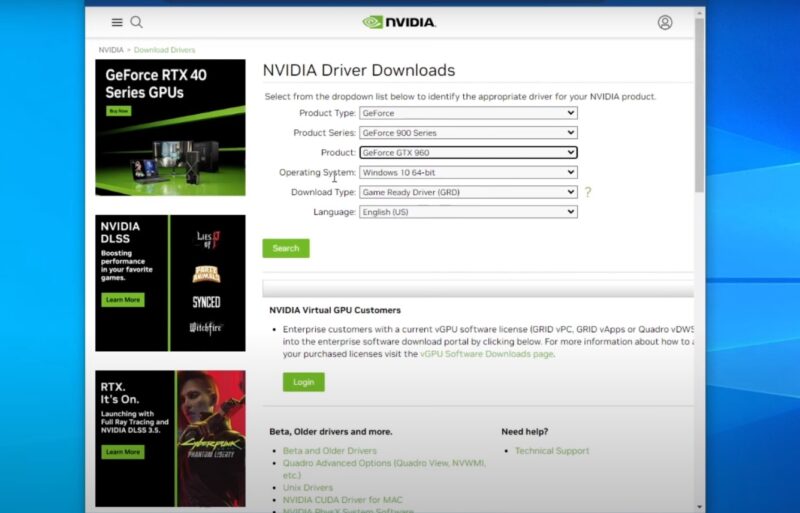
Download the Correct Nvidia Driver
- Visit Nvidia’s Official Website: Once you know your system type, visit Nvidia’s official website to download the appropriate driver.
- Selecting the Right Driver: Use the driver search tool on Nvidia’s website, inputting your graphics card model and your Windows version (32-bit or 64-bit).
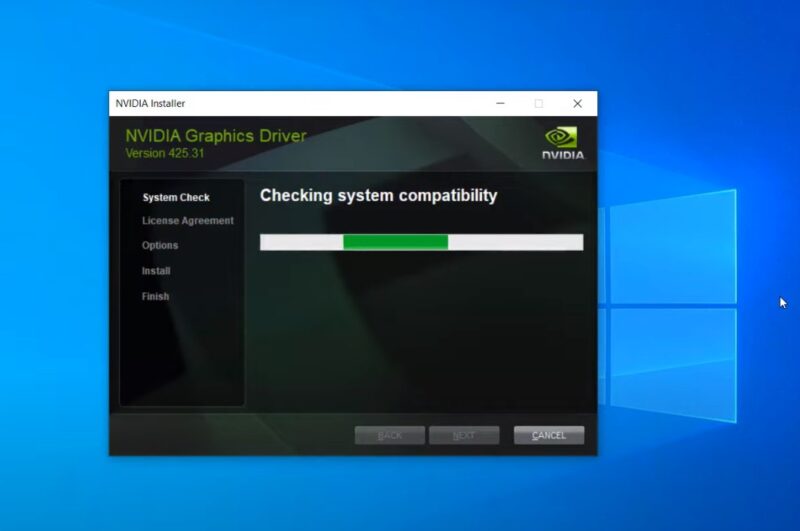
- Installing the Driver: After downloading the correct driver, run the installation file and follow the on-screen instructions to complete the installation.
You should consider an option to upgrade your graphics as well, especially if you are using it for a longer time.
2. Use Nvidia GeForce Experience
Nvidia GeForce Experience is a software application developed by Nvidia primarily for automating the process of updating graphics drivers. This tool is particularly useful for those who may not be familiar with manually searching for and installing drivers.
Benefits of Using Nvidia GeForce Experience
- Automatic Driver Updates: GeForce Experience automatically notifies you of new driver releases from Nvidia, eliminating the need for manual searches.
- Optimal Settings for Games: It also provides optimal game settings tailored to your PC, enhancing your gaming experience.
- Additional Features: The software offers features like game optimization, screen recording, and streaming.
How to Use Nvidia GeForce Experience?
- Download the Application: Download GeForce Experience from the Nvidia website and install it on your computer.
- Set Up: Upon launching, the software will automatically detect your Nvidia graphics card and display the latest compatible driver.
- Update Drivers: You can choose to download and install the driver directly through the application. It ensures that you always have the latest driver version that is compatible with your system.
Nvidia GeForce Experience for Clean Installation
- Initiate Clean Installation: Within Nvidia GeForce Experience, when you download a driver, you have the option to perform a ‘Custom Installation’, which includes an option for a clean install.
- Select Clean Install Option: This option removes all previous versions of the driver and their settings before installing the new driver.
- Reconfiguration: After a clean install, you may need to reconfigure your Nvidia settings.
How Clean Install Can Help?
- Remove Conflicts: A clean install ensures that old, possibly conflicting files and settings are removed.
- Fresh Settings: It allows the new driver to configure settings optimally for your current system setup.
3. Update Windows to the Latest Version
Keeping your Windows operating system up-to-date is crucial for compatibility with the latest drivers, including those from Nvidia. Microsoft regularly releases updates that not only improve security and functionality but also ensure compatibility with various hardware components and drivers.
How to Update Windows?
- Access Update Settings: To update Windows, go to ‘Settings’ > ‘Update & Security’ > ‘Windows Update’.
- Check for Updates: Click on ‘Check for updates’. If there are any available updates, Windows will download and install them automatically.
- Restart if Required: Some updates may require a system restart. Ensure to save your work and restart your computer to complete the update process.
Why Regular Updates are Important?
- Compatibility: New updates often come with support for the latest drivers and hardware, reducing the chances of compatibility issues.
- Security: Regular updates provide patches for security vulnerabilities, keeping your system safe from threats.
- Performance Improvements: Updates can also bring performance enhancements, improving the overall efficiency of your system.
Potential Challenges
While updating Windows is generally a straightforward process, there can be challenges:
- Update Errors: Sometimes, updates fail to install due to various errors. This may require troubleshooting, such as running the Windows Update Troubleshooter or resetting Windows Update components.
- Incompatibility with Older Systems: Very old hardware might encounter issues with the latest Windows updates, in which case consulting the hardware manufacturer or considering an upgrade might be necessary.
4. Ensure Compatibility of Nvidia Drivers with Current Windows Version
Nvidia graphics drivers are designed to be compatible with specific versions of Windows. Using a driver intended for a different version of Windows, especially versions before Threshold 2 version 1511, can lead to compatibility issues.
How to Check Your Windows Version?
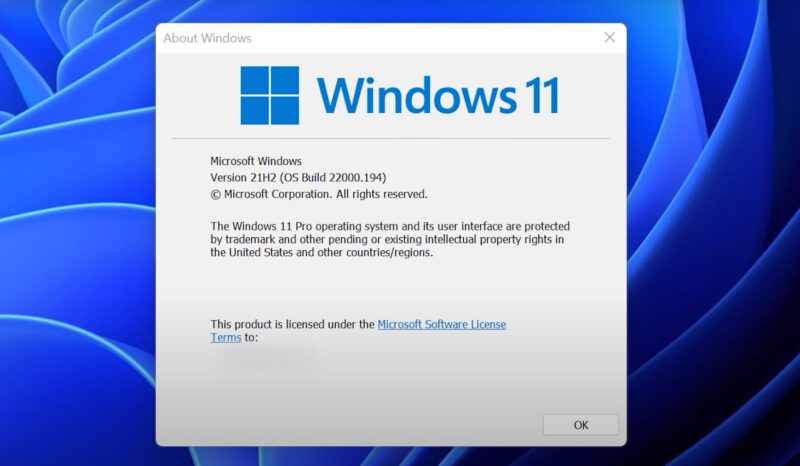
- Find Windows Version and Build: To check your Windows version and build number, type “winver” in the Windows search bar and press Enter. The window that pops up will display the version and build number of your Windows.
- Match Driver with Windows Version: When downloading drivers from Nvidia’s website, ensure the driver is meant for your specific Windows version and build. This information is usually clearly stated on the download page.
Importance of Driver and OS Synchronization
- Prevent Compatibility Issues: Using a driver that matches your Windows version helps prevent compatibility problems.
- Optimal Performance: Correct driver versions are optimized to work with specific Windows builds, ensuring better performance and stability.
Potential Solutions for Version Mismatch
- Update Windows: If your Windows version is too old, consider updating to a newer version that is supported by the latest Nvidia drivers.
- Find Suitable Drivers: If you cannot update Windows, you may need to search for older driver versions that are compatible with your Windows build.
5. Download and Install the Nvidia Studio Driver
The Nvidia Studio Driver is designed specifically for users engaged in creative work like video editing, graphic design, and 3D modeling. These drivers are optimized for stability and performance in creative applications and can sometimes offer better compatibility than standard game-ready drivers.
Benefits of Nvidia Studio Drivers
- Stability in Creative Applications: Studio Drivers undergo extensive testing with creative software packages to ensure reliability and performance.
- Frequent Updates: Like game-ready drivers, Studio Drivers are regularly updated to support the latest applications and hardware.
How to Install Nvidia Studio Drivers?
- GeForce Experience: Nvidia Studio Drivers can be downloaded and installed via GeForce Experience. In the ‘Drivers’ tab, you can switch between Game Ready and Studio Driver versions.
- Manual Download: Alternatively, you can manually download Studio Drivers from Nvidia’s website by selecting your graphics card model and choosing the Studio Driver option.
When to Choose Studio Drivers?
- For Creative Work: If you primarily use your system for creative applications, Studio Drivers can offer better performance and stability.
- Troubleshoot Compatibility Issues: If you’re experiencing compatibility issues with game-ready drivers, switching to Studio Drivers can be a worthwhile experiment, especially for non-gaming purposes.
7. Roll Back Windows or Nvidia Drivers
If updating Windows or Nvidia drivers does not resolve compatibility issues, or if new issues arise after an update, rolling back to a previous driver or Windows build can be an effective solution.
How to Roll Back Drivers?
- Through Device Manager: Go to Device Manager, find your Nvidia graphics card under ‘Display adapters’, right-click, and select ‘Properties’. Under the ‘Driver’ tab, you’ll find an option to ‘Roll Back Driver’, if available.
- With System Restore: If driver rollback is not available, you can use System Restore to revert your system to a previous state. Ensure you have system restore points created before updates.
When to Consider Rolling Back?
- Post-Update Issues: If issues only appeared after a recent driver or Windows update, rolling back can return your system to a stable state.
- No Other Solutions Work: If all other troubleshooting steps fail, reverting to a known stable version can be the best option.
Precautions
- Backup Important Data: Always backup your data before rolling back drivers or using System Restore, as these processes can potentially lead to data loss.
- Check for Updates After Rollback: Sometimes, rolling back and then updating again can resolve the issue, as it clears any errors that occurred during the initial update process.
FAQs
Is GTX 1650 compatible with Windows 10?
Yes, the GTX 1650 is compatible with Windows 10. You can download the latest driver for this graphics card from the NVIDIA website.
How do I know if my graphics card is compatible with Windows 10?
You can check your graphics card compatibility by looking at the PCIe x16 slot on your motherboard, the clearance space in your case, the power supply connectors, and the CPU and RAM performance. You can also use the Device Manager to see what graphics card is installed on your PC.
Why my PC Cannot detect GPU?
There are several possible reasons why your PC cannot detect your GPU, such as a disabled or outdated driver, a corrupted system file, a faulty BIOS setting, or a hardware problem. You can try to enable or update the driver, repair the system file, reset or update the BIOS, or test the GPU on another PC to troubleshoot the issue.
How do I manually install Nvidia drivers?
To manually install Nvidia drivers, you need to download the driver file from the NVIDIA website, run it as administrator, choose the custom installation option, and select the perform clean install option. You can also use the Device Manager, the Command Prompt, or the Windows Update to install the drivers.
Summary
The focus should be on a harmonious integration between hardware and software, achieved through a combination of accurate driver selection, leveraging Nvidia’s own tools for updates, and ensuring your operating system is in sync with your hardware needs.
The exploration of options like Nvidia Studio Drivers, and the understanding of when to roll back to a previous stable version, are part of a larger toolkit for any tech-savvy individual.